
Introduction: Why Stainless Steel Braided Hoses Are a Reliable Choice
Stainless steel braided hoses are widely used in both residential and industrial applications due to their strength, durability, and flexibility. Whether they’re connected to a faucet, washing machine, water heater, or industrial machinery, these hoses provide excellent resistance to pressure, temperature, and corrosion.
Proper installation of stainless steel braided hoses is essential to ensure long-term performance and leak-free operation. This guide will walk you through everything you need to know about installing stainless steel braided hoses safely and effectively, following industry best practices.
What Are Stainless Steel Braided Hoses?
Stainless steel braided hoses are flexible rubber or PTFE (Teflon) inner tubes covered with an external layer of woven stainless steel wire. This braided layer adds:
- Mechanical strength
- Burst resistance
- Protection against UV, abrasion, and chemicals
Because of these properties, they are commonly used for:
- Water supply lines
- Gas connections
- Hydraulic systems
- Steam and chemical applications
Now let’s get into the step-by-step installation process.
Tools and Materials You’ll Need
Before you begin installation, gather the following tools and materials:
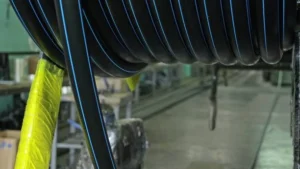
- Stainless steel braided hose (correct length and diameter)
- Adjustable wrench or spanner
- PTFE (Teflon) tape (if applicable)
- Clean cloth or rag
- Thread sealant (only if required by manufacturer)
- Gloves (optional for handling metal surfaces)
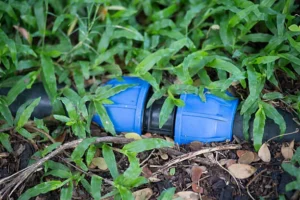
Make sure that the fittings on both ends of the hose match the inlet and outlet connections of the appliances or fixtures.
Step-by-Step Guide to Installing Stainless Steel Braided Hoses
Step 1: Shut Off the Water or Gas Supply
Always start by turning off the water, gas, or fluid line before removing or installing any hose. For water supply, turn off the shut-off valve; for gas lines, close the main supply valve.
Open a faucet or pressure release valve downstream to relieve any residual pressure in the line.
Step 2: Clean the Fittings and Threads
Use a clean cloth to wipe the male and female threads where the hose will be connected. Remove:
- Dirt
- Debris
- Rust
- Old thread sealant
This ensures a tight, leak-free connection and avoids damaging the hose fittings during installation.
Step 3: Inspect the Hose and Connectors
Before connecting, inspect the braided hose for any signs of:
- Fraying or damaged braid
- Cracks in the rubber or PTFE inner lining
- Loose or dented end fittings
Also, check that the washer inside the female end is seated properly. A missing or misaligned washer will cause leaks.
Step 4: Apply Thread Sealant (If Required)
Not all stainless steel braided hoses require thread sealant. For compression fittings, do not use Teflon tape. But for NPT threaded connections, wrap PTFE tape clockwise 2–3 times around the male threads. This helps improve the seal and prevent leaks.
⚠️ Always follow the manufacturer’s recommendation regarding sealants and tapes.
Step 5: Hand-Tighten the Hose First
Align the hose connector with the fitting and start threading it by hand. Do not cross-thread, as this can damage the threads and compromise the seal. Hand-tighten until snug.
Step 6: Secure with a Wrench
Once the connection is hand-tight, use an adjustable wrench to tighten the fitting a quarter to a half turn more. Avoid overtightening, as it can:
- Deform the washer
- Damage the threads
- Crack the appliance housing
Use a second wrench to hold the opposite fitting in place if needed, especially on delicate appliances.
Step 7: Check Hose Positioning
Ensure that the stainless steel braided hose is not kinked or twisted. The hose should have a smooth curve, not a sharp bend. Allow at least 2–3 inches of slack to accommodate vibration and thermal expansion.
✔️ Pro Tip: Use a 90-degree elbow fitting if installation space is limited or if the hose tends to bend sharply.
Step 8: Turn On the Supply Slowly
Open the water or gas valve slowly to allow pressure to build up gradually. This prevents sudden surges that could damage the hose or fittings.
Monitor the connection for any signs of leaks, such as:
- Drips
- Moisture
- Hissing sounds (for gas)
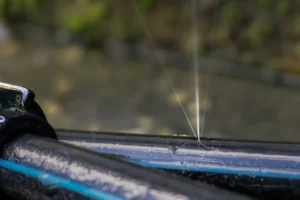
Step 9: Final Leak Test
Let the system run for several minutes, then recheck all connections. For water lines, you can run your finger around the connection to detect any moisture. For gas lines, use a soap and water solution to check for bubbles.
Installation Tips for Specific Applications
Plumbing Fixtures (e.g., Faucets, Toilets)
- Use hoses certified for potable water
- Avoid over-bending behind cabinets
- Replace hoses every 5–7 years as preventive maintenance
Washing Machines and Dishwashers
- Always use reinforced stainless steel hoses rated for high pressure
- Install flood prevention valves if required by local code
- Check for vibration and movement, which may loosen connections over time
Industrial Equipment
- Follow pressure and temperature ratings strictly
- Use double-braided hoses for higher PSI applications
- Secure hoses with clamps or brackets to minimize movement
Common Installation Mistakes to Avoid
- Overtightening connections
- Using incorrect thread sealant
- Cross-threading fittings
- Using mismatched hose sizes
- Failing to test for leaks
Avoiding these mistakes will ensure safe, long-lasting hose performance.
Conclusion: Secure Installation for Reliable Performance
Installing stainless steel braided hoses correctly is essential to achieving optimal performance and safety across residential, commercial, and industrial systems. From selecting the right hose type to securing the fittings properly, every step counts.
A properly installed braided hose reduces the risk of:
- Leaks
- Equipment damage
- Downtime
- Safety hazards
Whether you’re a homeowner, contractor, or facility manager, following these installation guidelines will help you get the most from your braided hose investment.
Contact
IFAN is a professional manufacturer with 30 years of experience, dedicated to producing high-quality plastic pipes, fittings, and valves. Our products include brass valves, PPR valves, as well as various pipes and fittings to meet different customer needs. Whether you need plumbing and drainage pipes or valve products. IFAN can provide a diverse range of high-quality, cost-effective products to support your projects. Below is our contact information.
We will reply your email or fax within 24 hours.
You can call us at any time if there is any question on our production.
Pls Mailto:[email protected]


Recent Comments