Imagine transforming your living space into a haven of perfect, even warmth that rises gently from the floor beneath your feet. This superior comfort becomes achievable through proper installation of radiant heat tubing, the heart of any hydronic heating system. Installing these specialized tubes requires careful planning, precision execution, and understanding of both the materials and methods involved. Unlike conventional heating systems that simply need equipment connection, radiant tubing installation becomes an integral part of your building’s structure. This comprehensive guide walks you through the entire installation process for radiant heat tubing, from initial planning to final testing. We will answer common installation questions, review key considerations, and examine how proper installation techniques ensure optimal system performance across various applications. Whether you’re a DIY enthusiast or working with professionals, understanding installation best practices will help you achieve maximum comfort, efficiency, and longevity from your radiant heating system.
Frequently Asked Questions (FAQ)
1. What type of floor covering works best with radiant heat tubing installation?
Tile and stone offer excellent heat transfer properties for radiant systems. Engineered wood and laminate flooring also work well when properly installed. You should avoid solid hardwood as it may crack from heat exposure. Always check with flooring manufacturers for specific compatibility recommendations before installation.
2. How much floor height does radiant tubing installation typically add?
The height addition depends on your installation method. Thin-set systems add only about 1/2 inch to floor height. Over-pour concrete systems may add 1.5 to 2 inches. Staple-up installations between joists add minimal height but require protective plates and insulation. Always consider door clearances and transition heights during planning.
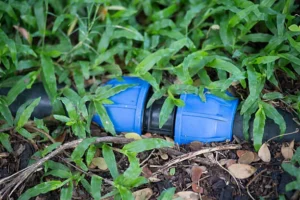
3. Can I install radiant tubing in existing homes without major renovation?
Yes, several retrofitting options exist for existing homes. You can install tubing between joists from below if you have basement or crawlspace access. Over-floor systems use lightweight gypsum or wood panels to contain tubing. Some systems even allow installation directly under existing flooring during renovation projects.
4. What spacing should I maintain between tubing runs during installation?
Tubing spacing typically ranges from 6 to 12 inches between runs. Closer spacing provides higher heat output for colder rooms or areas with heat loss. Wider spacing works well for moderate climates or rooms with good insulation. Always follow manufacturer specifications and heat load calculations for optimal spacing.
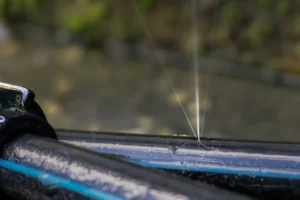
5. How do I pressure test the system after installation?
Pressure testing is crucial before covering the tubing. Most professionals test at 60-100 PSI for 24 hours before proceeding. You should monitor pressure gauges for any drops that indicate leaks. Always repair any leaks immediately and retest before concealing the tubing with concrete or flooring materials.
Installation Methods and Key Considerations
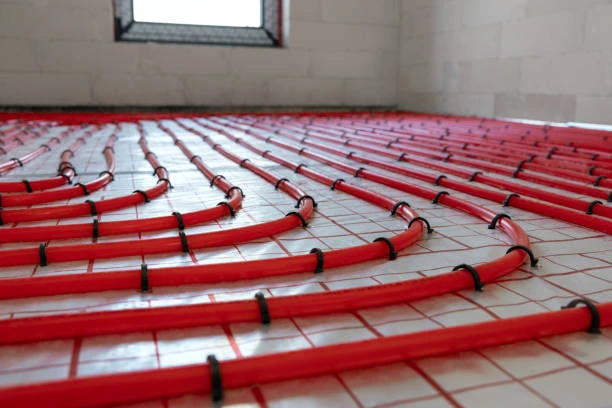
Radiant heat tubing installation involves several distinct methods, each with specific requirements and advantages. The most common approach is the staple-up method, where installers secure tubing to the underside of subfloors between joists. This method works well for retrofits and requires reflective insulation and heat transfer plates for optimal performance. The thin-set method embeds tubing in a special cement layer over existing subfloors, creating a thermal mass that radiates heat evenly.
The poured concrete method remains popular for new construction. Installers secure tubing to reinforcement mesh before pouring concrete slabs. This approach provides excellent thermal mass and durability but requires careful planning for manifold locations and expansion joints. Prefab panel systems offer another option, with grooved panels that hold tubing in perfect patterns for quick installation and consistent spacing.
Successful installation requires attention to several critical factors. Proper manifold placement ensures balanced flow through all tubing circuits. Tube length consistency maintains equal pressure drops across parallel circuits. Expansion accommodation prevents stress on tubing from structural movement. Insulation quality beneath the tubing prevents downward heat loss and improves system efficiency.
Installation professionals must also consider zoning requirements, heat load calculations, and integration with heat sources. They need to plan for future access to manifolds and valves while ensuring the entire system remains protected during subsequent construction phases. Proper documentation of tube locations prevents accidental damage during future renovations or installations.
Common Applications and Industry Practices
Radiant heat tubing installation practices vary across different applications and industries. Residential installers typically work with smaller zones and more complex layout requirements. They must coordinate with other trades to ensure proper sequencing of flooring, plumbing, and electrical work. Custom homes often feature elaborate zoning systems with individual room control and multiple manifolds.
Commercial installation projects require larger crews and more sophisticated planning. Office buildings need careful coordination with partition locations and furniture plans. Retail spaces must consider display arrangements and traffic patterns during tubing layout. Industrial facilities often prioritize durability and high heat output, using wider spacing and higher temperature water.
The agricultural industry has developed specialized installation techniques for greenhouse applications. Installers bury tubing in growing beds at specific depths to optimize root zone temperatures. They use closer spacing and lower water temperatures for delicate plants while maintaining proper moisture levels. Livestock barns require durable installations that withstand cleaning chemicals and physical impact.
Snow melt systems demand particularly precise installation practices. Installers must maintain even tubing spacing across entire surfaces to prevent ice formation. They integrate sensors and controls that activate systems based on weather conditions. Bridge deck installations require special adhesives and protective measures to withstand vibration and expansion.
Professional installers follow industry best practices including detailed system documentation, pressure testing protocols, and customer education. They provide clear operating instructions and maintenance guidelines to ensure long-term system performance and customer satisfaction.
Conclusion
In conclusion, proper radiant heat tubing installation requires careful planning, quality materials, and skilled execution. The installation process significantly impacts system performance, efficiency, and longevity. Following best practices ensures optimal heat distribution, minimal energy consumption, and reliable operation for decades.
Understanding installation methods helps homeowners make informed decisions and communicate effectively with contractors. It enables professionals to deliver superior results that maximize customer satisfaction. As radiant heating technology continues evolving, installation methods become more refined and accessible for various applications.
The future of radiant heat tubing installation looks promising with new materials and techniques constantly emerging. Whether for new construction or renovation projects, proper installation remains the foundation for enjoying all the benefits of radiant heating. By investing in quality installation today, you ensure decades of comfortable, efficient, and reliable heating performance that adds value to any property while reducing environmental impact.
IFAN’s international standards
IFAN products comply with multiple international standards, including BS 3505, BS 4346, ASTM D1785 SCH40, ASTM D1785 SCH80, DIN, GB, DWV, ASTM D2665, ASTM D2241, ASTM D2729, ASTM F441/F441M, ISO 1452 Series standards, EN ISO 1452, DIN 8061/8062, GB/T 10002 Series standards, AS/NZS 1477, JIS K6741, CSA B137.3, NSF/ANSI 14, TIS 17-2532/1131-2535, among others. These certifications ensure that IFAN piping systems meet global requirements for safety, durability, and performance.
Contact
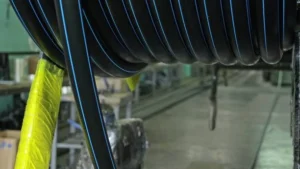
IFAN is a professional manufacturer with 30 years of experience, dedicated to producing high-quality plastic pipes, fittings, and valves. Our products include brass valves, PPR valves, as well as various pipes and fittings to meet different customer needs. Whether you need plumbing and drainage pipes or valve products. IFAN can provide a diverse range of high-quality, cost-effective products to support your projects. Below is our contact information.
We will reply your email or fax within 24 hours.
You can call us at any time if there is any question on our production.
Pls Mailto:[email protected]


Recent Comments