Planning Your Radiant Floor Tubing Layout
A successful radiant floor heating system begins with meticulous planning. First, you must decide on the heat distribution method. Will you use staple-up, plate-based, or thin-slab systems? Each method influences your tubing layout strategy. Next, create a detailed zoning plan for your home. This step involves dividing your floor space into separate areas with similar heating needs. You then design a dedicated tubing loop for each zone. Careful planning ensures even heat distribution and prevents cold spots. It also simplifies future system control and maintenance.
Preparing the Subfloor Surface
Proper subfloor preparation creates a solid foundation for your radiant floor tubing. Start by ensuring the surface is clean, dry, and completely level. Remove any debris, sharp objects, or protruding fasteners that could potentially damage the tubing. For staple-up installations, you need to install wood sleepers or attach mounting plates to the subfloor. These components provide secure anchor points for the tubing. For slab-on-grade applications, you typically place a layer of rigid insulation first. This critical layer prevents heat loss downward into the ground.
Selecting the Right Tubing Pattern
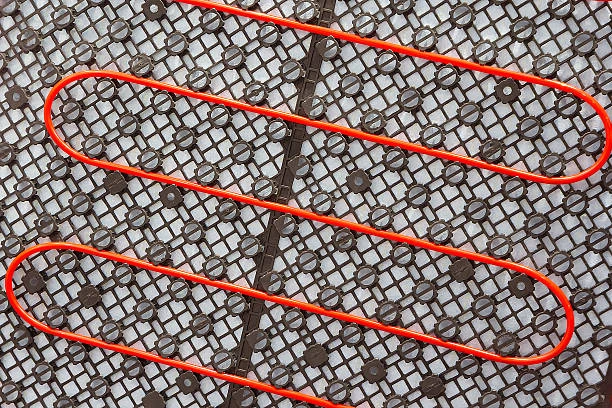
You generally have two main pattern choices for laying radiant floor tubing: the serpentine pattern and the spiral pattern. The serpentine pattern runs tubing back and forth in parallel lines. This approach works well for simpler, rectangular rooms. The spiral pattern, also called a counter-flow pattern, coils the tubing in a circular fashion from the perimeter towards the center. This method often provides more uniform floor temperatures in large or complex-shaped areas. Your choice should depend on the room’s shape and your specific heat output requirements.
Securing the Tubing in Place
You must secure the radiant floor tubing properly to maintain consistent spacing and prevent movement during the concrete pour. For wood subfloors, you typically use special plastic staples with a staple gun. You place these staples at regular intervals along the tubing length. In plate systems, the tubing simply snaps securely into the pre-formed aluminum channels. For concrete slab installations, many installers use rebar or wire mesh as a support structure. They then use plastic zip ties to fasten the tubing to this grid at precise intervals.
Managing Tubing Length and Pressure Loss
Each continuous loop of radiant floor tubing has a maximum practical length. Exceeding this length can cause excessive pressure drop, which reduces flow and leads to poor heating performance. You must balance each loop to ensure consistent heat output across all zones. Generally, you should keep individual loop lengths within a similar range. The manifold acts as the central hub, allowing you to independently adjust the flow to each loop. This careful balancing at the manifold is key to achieving a high-performing and efficient system.
Pressure Testing Before Pouring Concrete
You must always perform a pressure test on the entire radiant floor tubing network before enclosing it in concrete. This non-negotiable quality control step verifies the integrity of every fitting and the tubing itself. First, fill the system with water and purge all air. Then, use a hand pump to pressurize the loops to a level that exceeds normal operating pressure, often around 100 psi. You must monitor the pressure gauge for a significant period. A stable pressure reading confirms there are no leaks, giving you the green light to proceed.
The Concrete Pouring Process
The concrete pour is a critical phase that requires careful attention. You must maintain the test pressure in the radiant floor tubing during the entire pour. This practice allows you to immediately detect any accidental damage from tools or workers. Use a suitable concrete mix, typically a high-strength formulation with a low slump, to ensure it flows evenly around the tubing without displacing it. Avoid using vibrators directly on the tubing or the securing mesh. The crew should instead use rakes and screeds to consolidate and level the concrete properly.
System Activation and Curing
After the concrete pour, you must allow the slab to cure fully before activating the heating system. A typical curing period lasts at least 21 to 28 days. You can then start the system for the first time, but you must do so gradually. Begin by circulating ambient-temperature water through the radiant floor tubing for a day or two. Then, slowly increase the supply temperature in small increments over the next several days. This gradual heating process allows the concrete slab to adjust thermally, preventing stress cracks and ensuring long-term system integrity.
Grand Opening! 🎉
Your trusted hardware store is now open at 25 Ritter Avenue Center Line Michigan! To celebrate, enjoy special discounts on all your essential tools and supplies. Don’t miss out—come visit us and upgrade your toolkit today! We can’t wait to welcome you! 🔧🛠️
IFAN’s international standards
IFAN products comply with multiple international standards, including BS 3505, BS 4346, ASTM D1785 SCH40, ASTM D1785 SCH80, DIN, GB, DWV, ASTM D2665, ASTM D2241, ASTM D2729, ASTM F441/F441M, ISO 1452 Series standards, EN ISO 1452, DIN 8061/8062, GB/T 10002 Series standards, AS/NZS 1477, JIS K6741, CSA B137.3, NSF/ANSI 14, TIS 17-2532/1131-2535, among others. These certifications ensure that IFAN piping systems meet global requirements for safety, durability, and performance.
Contact
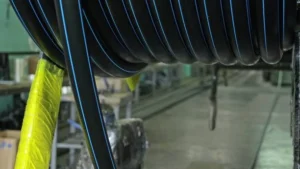
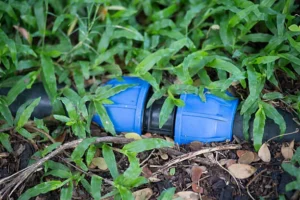
IFAN is a professional manufacturer with 30 years of experience, dedicated to producing high-quality plastic pipes, fittings, and valves. Our products include brass valves, PPR valves, as well as various pipes and fittings to meet different customer needs. Whether you need plumbing and drainage pipes or valve products. IFAN can provide a diverse range of high-quality, cost-effective products to support your projects. Below is our contact information.
We will reply your email or fax within 24 hours.
You can call us at any time if there is any question on our production.
Pls Mailto:[email protected]


Recent Comments